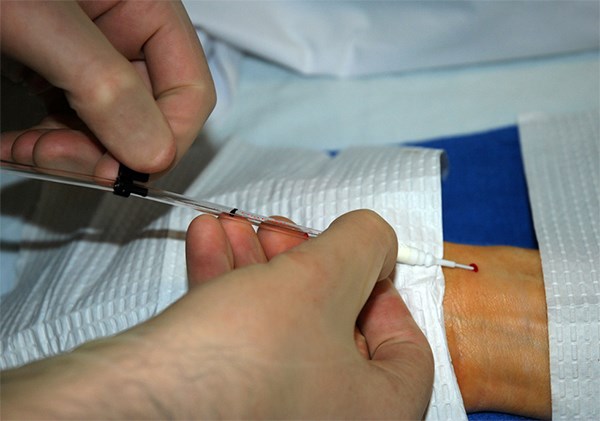
Arterial lines are a useful device in a variety of clinical settings for the medical team.
Arterial lines, or "A-lines," consist of a small catheter connected to a transducer that allows real-time blood pressure and hemodynamic monitoring of patients along with easy access for blood gases and other labs for critically ill patients.
A-line placement can be performed blind or via ultrasound guidance. After learning the basic steps for arterial line placement, this guide will serve as an advanced tips and trick resource to ensure your arterial lines can be placed effectively and efficiently.
Prep: Setting Yourself Up for Success
In order to maximize your odds of successfully placing an arterial line, proper setup is absolutely key. Selecting the best site for your application and patient is important by scouting before you start to prep your site. Ensuring wrist securement/extension, and bed height also will help you be comfortable and allow you to focus on the procedure. If a femoral arterial line is being placed, "frog-legging" a patient can allow the femoral artery to come into better view on ultrasound. Lastly, ensure your equipment and supplies are easily in arm’s reach for you prior to going sterile.
Ultrasound Optimization
Ultrasound access with arterial lines has many benefits and allows for direct visualization when cannulating the artery. While it is a great tool for the physician, there are steps to take prior to your attempt so the ultrasound works best for you. When attaching a sterile probe cover, ensure that you have a thin, yet adequate gel layer beneath the cover free of any air bubbles. Air bubbles will distort your echoic window. Furthermore, set the ultrasound settings to the highest depth needed to optimize your viewing window. M-Mode if available can also aid in centering your needle entry to the ultrasound screen. Lastly, increasing gain on the ultrasound can aid in better visualization of the needle tip while undergoing cannulation with the introducer needle.
Equipment and Needle Prep
For arterial lines, there are differences in kits where some may be direct angiocatheters or guide wires (internal or external). Be sure to prep either kit ensuring the wire can freely flow through the needle and that your needle bevel is facing up prior to entry. If you are using an external guide wire in a plastic loop sheath, extend the wire approximately 5-8cm out with the introducer tip. Allowing this will let the handler easily start to feed in the guide wire into the cannulation needle.
Needle Entry
Arterial line placement is taught to be done at a 30-45 degree angle to the skin with the bevel facing upwards. Prior to entry, ensure the desired arterial site and depth lines up to your distal skin entrance and soft tissue distance that must be traversed. Internal manipulation in a non-linear fashion of the needle will lead to excessive friction when introducing the catheter and should be avoided if possible. If the clinician believes he or she is in the arterial lumen yet no flash is observed, the ultrasound should be utilized, fanning the probe appropriately, to locate the needle tip. The anterior wall of the artery should be depressed and then released once the needle punches through the wall into the lumen. The needle tip, if in the lumen, should be free-floating and not distort surrounding soft tissue if manipulated.
Wire Entry
While passing the wire, the wire should easily pass into the needle and into the lumen of the artery. If this does not occur, ensure with ultrasound again that your needle tip is in the lumen of the vessel. Sometimes the needle tip can be obstructed by the anterior or posterior wall of the artery and should be adjusted. Slight shallow angling can also be used to aid wire entry if your needle entrance angle was too steep. If you pass the wire and are not sure if it is intraluminal, use your ultrasound in long and short axis to confirm placement with the needle removed.
Catheter Placement
When placing the catheter into the artery, the process should be smooth without noticeable resistance. DO NOT make a skin incision with a scalpel if the catheter is having difficulty feeding (the needle makes a large enough bore for you). If you have difficulty, ensure the surrounding soft tissue is taught to aid in the catheter traversing through the subcutaneous tissue. A gentle twisting motion should also be utilized to help overcome tight points in the tissue as well. Lastly, for femoral lines in particular the amount of subcutaneous tissue can be difficult to pass arterial lines. Having an assistant or tape hold pannus out of the way can be helpful. Always ensure when placing that the wire freely moves, and if needed, raise your angle for insertion of the catheter similar to the needle introduction to get through multiple centimeters of soft tissue in the groin.
Securement
For radial arterial lines, the transducer tubing should be wrapped around the patient’s thumb and secured back along the wrist to minimize the chance of dislodgement. For catheters that only have a circumferential catheter notch for securement, throw an additional half-hitch knot around the arterial line before your first tie with a double box knot. Doing so will increase the knot friction and lessen the chance of an arterial catheter from dislodging.
REFERENCES
- Tegtmeyer K, Brady G, Lai S, Hodo R, Braner D. Placement of an Arterial Line. N Engl J Med. 2006;354(15):e13.
- Koyfman A, Radwine Z, Sawyer TL. Arterial Line Placement. Medscape. May 15, 2017. Accessed May 15, 2022.
- Tintinalli. Emergency Medicine: A Comprehensive Guide 8th Ed. McGraw Hill. 2011:205-209.


